Hier, was JLog2[.x] kann in Übersicht. Unterschiede von JLog2.6 sind vorläufig hier beschrieben.
Gehen Sie auf die Download-Seite und laden Sie Ihre Firmware herunter. Dort gibt es Download-Selektoren, einen für JLog2, für JLog2.5, für JLog2.6. Dieser gibt Ihnen gleichzeitig alle benötigten weiteren Informationen und Anschlussbeschreibungen. Unter dem Selektor-Knopf finden Sie noch einmal alle Anschlussbilder in Übersicht, bzw. auch hier. Anschlussweisen für JLog2.6 sind identisch, nur, dass er noch einen Data Port hat für CVS16, HV²BEC und zukünftig noch andere Geräte.
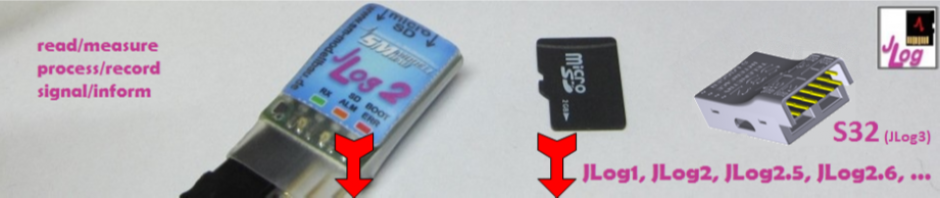
Firmware auf JLog flashen:
Kopieren Sie die heruntergeladene Datei (Firmware) auf die MicroSD, und zwar “ganz oben”, also in’s Wurzelverzeichnis, nicht in ein Unterverzeichnis. Setzen Sie die SD in JLog und geben Sie diesem Betriebsspannung. Die rote LED des JLog leuchtet, beginnt dann zu blinken für ca. 15 Sekunden. Danach startet JLog die Applikation, ist betriebsbereit.
Überprüfen Sie, ob JLog die richtige Firmware geflasht hat, indem Sie die Datei “version.txt” auf der SD lesen.
Belassen Sie nie mehr als eine Firmware-Datei auf der SD, JLog würde sich sonst bei jedem Start mit einer anderen Firmware reflashen! Am besten, man löscht die Firmware-Datei nach dem Flashen wieder.
Alle Firmwares starten und arbeiten auch, wenn keine SD eingelegt ist, nur geloggt werden kann dann nicht, natürlich.
LEDs: Beim Start der Applikation blinkt JLog mit 3 LEDs für 5 Sekunden. Danach blinkt die grüne LED 1x für jedes Datenpaket, was vom ESC empfangen wird. Für jeden aufgezeichneten Log Record blinkt die orange LED 1x. Dauerbrennen der orangen LED dient als genereller Alarmindikator, wenn Alarme konfiguriert wurden und wenigstens einer gerade ausgelöst hat. Die rote LED sollte niemals leuchten, sie signalisiert einen fatalen Fehler mit der SD-Karte. JLog2.6 hat eine vierte, blaue LED, ihr Blinken signalisiert Aktivität auf dem Data Port.
Vor der ersten Benutzung muss JLog konfiguriert werden. Das geschieht mittels der Datei “CONFIG.txt” im Wurzelverzeichnis der SD. JLog liest diese beim Start, konfiguriert sich entsprechend und merkt sich die Einstellungen in seinem Speicher (EEPROM). JLog läuft ja alternativ auch ohne SD, dann nimmt er die letzten gelernten Einstellungen aus seinem EEPROM. Legt man eine leere (formatierte: FAT16!) SD ein, oder ist aus anderen Gründen keine Datei “CONFIG.txt” vorhanden, dann erzeugt JLog diese selbst und füllt sie mit den zuletzt aus einer “CONFIG.txt” gelernten Einstellungen. (JLog erzeugt auch alle weiteren Dateien und das benötigte Unterverzeichnis für Log-Dateien selbst.)
Das Konfigurieren (das Befüllen von “CONFIG.txt”) geschieht mit dem Konfigurator “JLC“. Laden Sie JLC herunter und installieren Sie ihn, JLC5 für JLog2[.5], JLC7 für JLog2.6 UND JLog2[.5], wenn eine “konsolidierte Firmware” verwendet wird. *).. Achten Sie darauf, dass Sie immer die aktuelle Version verwenden! JLC basiert auf .NET, läuft daher nur unter Windows®. *) ”Konsolidierte Firmware” für JLog2, JLog2.5: ”Funktionelles Look&Feel” von JLog2.6.
Nach dem Flashen: JLog hat seine “Duftmarke” (Versionskennzeichen) in “CONFIG.txt” hinterlassen. Verbinden Sie die SD mit Ihrem PC mittels des USB Readers, lesen Sie die Datei in JLC ein, modifizieren Sie die Konfiguration nach Ihren Wünschen und schreiben Sie im JLC “CONFIG.txt” zurück auf die SD. JLog lernt die neuen Einstellungen daraus beim nächsten Start mit dieser SD.
Achten Sie auf die Help-Funktionen in JLC: Wenn der Mauszeiger auf ein Element zeigt oder man hineinklickt, erscheint im Textfenster unten links eine betreffende Hilfe. Außerdem befinden sich hinter Ikonen und einigen Text-Labeln Links zu weiteren Hilfen im Internet, auf der JLog Home Page.
Wegen des notwendigen Registrierens von Sensoren der Futaba-Telemetrie am “Terminal” (Sender, Robbe T-Box) lesen Sie bitte hier, weiterführend später auch das.
Feb-18 2014: Achtung! Seit einiger Zeit wird JLog2.5, und nun auch JLog2.6, eine SD-Karte eines anderen Herstellers beigelegt. Diese Karte ist deutlich schneller als die zuvor gelieferte von SanDisk. Leider stellte sich erst jetzt heraus, dass JLog offenbar ein Problem mit dem vorformatierten Dateisystem hat. Insbesondere über fehlerhaftes Lesen von CONFIG.txt bzw. durch falschen Inhalt nach automatischem Überschreiben durch JLog kann es zu undefiniertem Verhalten des Loggers kommen. Bitte formatieren Sie die SD-Karte in ihrem PC mit dem SDformatter von sdcard.org (auch für Mac verfügbar)!
(Einstellung beim Formatieren: “Option” –> “Format Size Adjustment”=ON // “Format Type”=QUICK) Es ist nicht bekannt, wie systematisch das Problem auftreten kann, welchen Teil der relevanten Charge SD-Karten es überhaupt betrifft. In Reaktion darauf werden ab sofort alle SD-Karten vor Auslieferung nochmals durch R²prototyping formatiert.
Tipps: - KOSMIK: 1) Dessen Firmware muss mindestens 4.0 sein! 2) Der KOSMIK sendet weder “Ubec” noch “Gas”. - JLog2.x: Telemetrie Multiplex, JETI, HoTT, JR, Livestream: Die rote Leitung im Servokabel muss unterbrochen werden! - Am S.BUS2-Anschluss ist das eigentlich nicht erforderlich, allerdings gibt JLog2.x auf der roten Leitung ca. 3,2V aus, was zur Spannungsversorgung eines Unidisplay gedacht ist, oder, wenn man mehr als einen Typ JLog-eigenen Sensor gleichzeitig anschließt, als Stromversorgung der Sensoren. Ein Futaba-Empfänger wird dann also auf diesen 3,2V weiterlaufen, wenn er keine reguläre Stromversorgung mehr erthält. Um Verwirrung diesbzgl. zu vermeiden, kann man auch hier die rote Leitung trennen, muss das aber nicht.
————————-
Important information regarding the SD card! –>Click
Use the Online Manual … and Google Translator *rolleyes*.
Before you use your JLog for the 1st time:
Here JLog2[.x] at a glance. Differences of JLog2.6 preliminary described here (German only currently).
Go to the download page and download your firmware. There are download selectors, one for JLog2, for JLog2.5, for JLog2.6. The selector gives you also further information and wiring diagrams. Under the selector button see again all wiring diagrams in overview, and also here. Wiring with JLog2.6 is identical except of that it has a Data Port for connection to CVS16, HV²BEC and future devices.
How to flash the firmware on JLog: Copy the downloaded file (firmware) on the MicroSD, namely “on top”, that’s in the root directory, not in a subdirectory. Insert the SD into JLog and supply voltage. JLog’s red LED lights, then begins to flash for about 15 seconds. Thereafter JLog starts the application and is ready for use.
Check if JLog have flashed the correct firmware by reading the file “version.txt” on the SD.
Never leave more than one firmware file on the SD, JLog would otherwise reflash itself at each start with a different firmware! It is best to delete the flash file then.
All firmwares start and work also if no SD is inserted, there is no log recording then, of course.
LEDs: At start of the application JLog blinks with 3 LEDs for 5 seconds. Afterwards the green LED blinks 1x for each data packet received from ESC. For every recorded data set the orange LED blinks 1x. Solid orange LED is a general alarm indicator if alarms are configured and at least one currently triggered. The red LED should never burn, indicating a fatal SD error. JLog2.6 has a 4th (blue) LED which blinks to indicate activity on the Data Port.
Before first use JLog must be configured. This is done using the “CONFIG.txt” file in the root directory of the SD. JLog reads this at startup and configures itself accordingly, remembers the settings in its memory (EEPROM). As said, JLog runs alternatively also without a SD, then he takes the last settings learned from its EEPROM. If you put a blank (formatted: FAT16!) SD, or for other reasons no file “CONFIG.txt” is present, then JLog creates themselves the file and fills it with the last from a “CONFIG.txt” learned settings. (JLog generates all other files and the required sub-directory for log files themselves.)
Configuration (the filling of “CONFIG.txt”) is made with the configurator “JLC“. Download JLC and install it, JLC5 for JLog2[.5], JLC7 for JLog2.6 AND JLog2[.5] if a “consolidated firmware” is used. *).. Make sure that you always use the latest version! JLC is based on. NET, so only runs under Windows ®. *) “Consolidated firmware” for JLog2, JLog2.5: ”Functional Look&Feel” of JLog2.6.
After flashing: JLog has left his “scent mark” (version identifier) in “CONFIG.txt”. Connect the SD to your PC by the USB reader, read the file into JLC, modify the configuration according to your needs and write by JLC “CONFIG.txt” back to the SD. JLog learns the new settings at next startup with that SD.
Pay attention to the help functions in JLC: With the mouse pointer on an item or if you click into it, a help appears in the text window bottom left. Also are behind some icons and text labels links to other help on the Internet, on the JLog home page.
Because of the need of sensor registering with the “terminal” (transmitter, Robbe T-Box) in Futaba telemetry please read here, in addition later also this. (We apologize, both articles still need to be translated into English.)
Feb-18 2014: Attention! For some time a SD card from another manufacturer is supplied with JLog2.5 and now JLog2.6 too. This card is significantly faster than the previously from SanDisk. Unfortunately, it turned out now that JLog obviously has a problem with the preformatted file system. In particular, on erroneous reading of CONFIG.txt or by incorrect content after automatic overwriting by JLog it may cause undefined behavior of the logger. Please format the SD card in your PC with the SDformatter from sdcard.org(also available for Mac)!
(Formatter setup: ”Option” –> “Format Size Adjustment”=ON // “Format Type”=QUICK) It is not known how systematically the problem may occur, which part of the concerned batch SD card it affects at all. In response, all SD cards will be re-formatted by R²prototyping nowprior to shipping.
Hints: - KOSMIK: 1) Its firmware release must be at least 4.0! 2) The KOSMIK does not send neither “Ubec” nor “Throttle”. - JLog2.x: Telemetry Multiplex, JETI, HoTT, JR, Livestream: Cut the red wire of the servo cable! - On the S.BUS2 connection that is not really necessary, but the red line of JLog2.x provides approximately 3.2V which are intended to power an UniDisplay, or, if you connect more than one type of JLog-own sensors at the same time , as power supply of the sensors. So a Futaba receiver will continue to run on these 3.2V even if a regular power supply is no more provided. To avoid confusion in this regard, you can also disconnect the red line but do not have to.